Infusion Resource Center
Whether you’re looking for quick help with a specific issue or a full training program to get your team started, you will find our support and learning resources helpful, flexible, and convenient.
CURLIN 6000
CURLIN 6000 training videos, downloads, FAQs, troubleshooting, and more. More »

CURLIN PainSmart
CURLIN PainSmart training videos, downloads, FAQs, troubleshooting, and more. More »
Articles & Insights
Stay up-to-date on the
latest news & insights. More »
CURLIN 6000 Training Videos
For an optimal viewing experience, we recommend using one of the following web browsers: Google Chrome, Microsoft Edge, Apple Safari, or Mozilla Firefox


CURLIN 6000 Patient Training Videos


Troubleshooting & Alarms
CURLIN 6000 Troubleshooting & Alarms
For a full list of alarms and troubleshooting guidance, please see the CURLIN 6000 User Manual.
For all alarms except “INFUSION COMPLETE”, follow these instructions before proceeding to the RESOLUTION section below:
- To silence and exit Alarm/Alert screens, press the PAUSE key
- Press YES to RESUME, then resolve the alarm
- When ready to resume the infusion, press RUN to start the infusion.
Alarms, possible causes, and steps for resolution
- INFUSION COMPLETE
Press PAUSE, attach new solution container, highlight REPEAT RX and press YES. The program will auto-scroll (or confirm each field by pressing YES). If therapy is complete, turn pump off. - AIR-IN-LINE
Press the PRIME key, then follow on-screen instructions to remove air from the tubing and IV bag. CAUTION: Disconnect set from patient’s access site before priming. Sets with in-line ASVs must be primed on the pump. - DOWN OCCLUSION
Down occlusions auto-correct when occlusion is resolved without the need to press PAUSE. Check the tubing from pump to patient’s IV site for cause, then correct obstruction per protocol. Consider changing the DN Occlu setting from LOW to HIGH (See OPTIONS section). Possible causes: kinked or clamped line, infiltrated/ positional IV site, viscous solution, small gauge catheter. - UP OCCLUSION
Check tubing from pump to IV bag for cause, then correct obstruction per protocol. Possible causes: glass container without vented spike adapter, line kinked in pump door, bag empty, bag not spiked properly. - HIGH UP PRESSURE
Check for excessive pressure on IV bag. Causes: uneven fluid distribution within lockbox or carrying pouch, object pressing on solution container. - SET NOT INSTALLED
Use only Curlin administration sets. Check that set is installed properly. Refer to Instructions for Use in set package or Installing Administration Set section in this guide. Possible causes: tab not removed from yellow Flow-Stop, blue guide pin or yellow flow-stop not properly seated in receptacles, no set installed. - UNATTENDED
The pump will alarm when left idle for 2 minutes. Press RUN to start the infusion or press OFF to power down the pump. - REPLACE SET 3
Replace set and prime if necessary. Possible causes: flattening of the soft pumping segment of the set due to overuse, use of a glass container without a vented spike adapter, excessive plunger stiction with syringe use. - REPLACE SET 4
Equalize the pressure in the set by priming (disconnect from the patient). Turn pump OFF then ON to reset the sensor prior to resuming the infusion. - DOOR OPEN
Check placement of the administration set and close pump door properly. See User’s Manual for instructions. - EMPTY BATTERY
Turn pump off by pressing the OFF key. Install 2 new batteries and turn pump back on. - ERROR CODE
If an error code occurs, turn pump off and consult provider or manufacturer.
Available Downloads
Find a selection of pdf downloads for the CURLIN 6000 pump.
CURLIN 6000:User Manuals, Guides, & Information
User Manual & Clinician Guides
Supporting Documents and Information
Infusion Infographics
Click on any of the images below to view the full-size infographic.
CURLIN PainSmart Training Videos
For an optimal viewing experience, we recommend using one of the following web browsers: Google Chrome, Microsoft Edge, Apple Safari, or Mozilla Firefox


Troubleshooting & Alarms
CURLIN PainSmart Troubleshooting & Alarms
For a full list of alarms and troubleshooting guidance, please see the CURLIN PainSmart User Manual.
For all alarms except “INFUSION COMPLETE”, follow these instructions before proceeding to the RESOLUTION section below:
- To silence and exit Alarm/Alert screens, press the PAUSE key
- Press YES to RESUME, then resolve the alarm
- When ready to resume the infusion, press RUN to start the infusion.
Alarms, possible causes, and steps for resolution
- INFUSION COMPLETE
Press PAUSE, attach new solution container, highlight REPEAT RX and press YES. The program will auto-scroll (or confirm each field by pressing YES). If therapy is complete, turn pump off. - AIR-IN-LINE
Press the PRIME key, then follow on-screen instructions to remove air from the tubing and IV bag. CAUTION: Disconnect set from patient’s access site before priming. Sets with in-line ASVs must be primed on the pump. - DOWN OCCLUSION
Down occlusions auto-correct when occlusion is resolved without the need to press PAUSE. Check the tubing from pump to patient’s IV site for cause, then correct obstruction per protocol. Consider changing the DN Occlu setting from LOW to HIGH (See OPTIONS section). Possible causes: kinked or clamped line, infiltrated/ positional IV site, viscous solution, small gauge catheter. - UP OCCLUSION
Check tubing from pump to IV bag for cause, then correct obstruction per protocol. Possible causes: glass container without vented spike adapter, line kinked in pump door, bag empty, bag not spiked properly. - HIGH UP PRESSURE
Check for excessive pressure on IV bag. Causes: uneven fluid distribution within lockbox or carrying pouch, object pressing on solution container. - SET NOT INSTALLED
Use only Curlin administration sets. Check that set is installed properly. Refer to Instructions for Use in set package or Installing Administration Set section in this guide. Possible causes: tab not removed from yellow Flow-Stop, blue guide pin or yellow flow-stop not properly seated in receptacles, no set installed. - UNATTENDED
The pump will alarm when left idle for 2 minutes. Press RUN to start the infusion or press OFF to power down the pump. - REPLACE SET 3
Replace set and prime if necessary. Possible causes: flattening of the soft pumping segment of the set due to overuse, use of a glass container without a vented spike adapter, excessive plunger stiction with syringe use. - REPLACE SET 4
Equalize the pressure in the set by priming (disconnect from the patient). Turn pump OFF then ON to reset the sensor prior to resuming the infusion. - DOOR OPEN
Check placement of the administration set and close pump door properly. See User’s Manual for instructions. - EMPTY BATTERY
Turn pump off by pressing the OFF key. Install 2 new batteries and turn pump back on. - ERROR CODE
If an error code occurs, turn pump off and consult provider or manufacturer.
Available Downloads
Find a selection of pdf downloads for the CURLIN PainSmart pump.
CURLIN PainSmart User Manuals, Guides, & Information
Infusion Infographics
Click on any of the images below to view the full-size infographic.
CURLIN 6000 & PainSmart FAQs
for Patients & Caregivers
Q: What should I do if I have questions about the pump?
Whenever you have questions about the pump or your therapy, you should first call your healthcare pharmacy provider. For PUMP only related questions, Moog’s Technical Support Line is found on the back of the pump and available 24 hours a day, 7 days per week. Toll Free 1-800.970.2337
Q: Where can I order a pump or supplies?
Contact your healthcare pharmacy provider for all supply needs. Use only CURLIN Infusion administration sets in your CURLIN ambulatory infusion pump.
Q: How do I load the administration set?
Refer to the Patient Guide or the Instructions for Use inside the set package. Patient training videos and other helpful information is located at our Infusion Patient Center.
Q: What do I do if the pump gets dropped, damaged or the door won’t open properly?
Visually inspect the pump, pumping chamber and administration set before use. Do not use any pump or administration set that appears to be damaged or tampered with or if there is any indication of improper function. Contact your healthcare pharmacy provider for a pump exchange.
Q: How do I know the pump is running my therapy?
If the pump is infusing medication, you will see a flashing green LED light next to the words RUN, on the front of the pump below the display screen. It will flash once every three seconds when a therapy is in progress.
Q: What do the words UNIDENTIFIED mean on the display screen?
“Unidentified” is a place holder where the drug name would be displayed if the program had been chosen from a drug library. If you are seeing UNIDENTIFIED, there is no drug library loaded on the pump.
Q: How do I move around with the pump?
CURLIN Infusion Pumps have a carry pack specifically designed to allow you to be mobile and active while receiving your therapy. Your healthcare provider will demonstrate how to use the carry pack. The air from the medication bag must be removed prior to connecting to the patient and using in a backpack. Consult with your healthcare provider for steps removing air if not done prior to use.
Q: Where do I leave the pump when I want to sleep?
Place the pump at your bedside or next to you on the bed. Your clinician may have special instructions for bedtime use of the pump.
Q: How do I bathe or shower during my therapy?
The pump is water resistant, but not waterproof, so it should be placed outside your tub or shower. Discuss with your clinician best methods for bathing while being on therapy.
Q: Can I travel with the pump on a plane?
Yes. On the Download page, we have supplied a customer letter that can be provided to the airline company when travelling. Download the commercial air travel letter here.
Q: Can I take the pump into a CT Scan or MRI?
No. Neither the pump nor the administration set can be placed in the MRI room as both have metal.
Q: Can I take the pump into a Hyperbaric Chamber?
No, it is not recommended the patient have the pump with them in the chamber. The pump’s keys may be sensitive to the pressure and inadvertently depress.
Q: How do I exit the help screen?
When the pump is paused and the help/option key is pressed, a help message will appear. Press the help/options key again to exit the help screen.
Q: How do I access the Bolus feature?
Your pharmacy should provide a remote bolus cable accessory. It plugs into the port on the side of the pump.
If the bolus cable is not available, a bolus can also be delivered by pressing the green BOLUS key located on the front of the pump, at the bottom right side.
Q: How do I know if I received a bolus?
After requesting a bolus, you will hear two beeps if it is within the time interval ordered by the physician and programmed in the pump. One beep means you have requested the bolus too early. Contact your provider for further support managing this therapy.
Q: How do I remove the AC Adapter/Charger, the Bolus Cable
Pull on the ring (blue for the AC Adapter/Charger, green for the Bolus Cable) and the cord will be released from the pump.
Q: Approximately how long will new batteries last?
Battery life depends on the usage. The following times are approximate only:
- Nominal 85 hours at a rate of 2 ml/hr
- Nominal 30 hours at a rate of 125 ml/hr
- Nominal 10 hours at a rate of 400 ml/hr
However, if the patient is frequently pressing keys, that action will illuminate the display and the battery life will be shortened. To extend battery life, the AC Adapter may be used at night.
Q: How can I determine how much battery power is remaining in the pump?
- Read the power bar graph when you first turn on the pump. This is an approximation of the power remaining in the C-cell batteries
- Use the options menu and select PWR CK to view the power bar graph while the pump is running.
WARNING: In a life sustaining situation it is recommended that your CURLIN Infusion pump use the AC Adapter and have a back-up pump available. In addition to the batteries that are installed in the pumps, an extra set of C-cell batteries should be readily accessible.
Q: Are the C-cell batteries in the pump rechargeable?
No. However, a rechargeable external battery pack and an Adapter/charger are available for use with the pump.
Q: Can I change the batteries while the pump is running?
Before changing the batteries, you must PAUSE and POWER OFF the pump to avoid a software error occurring.
Q: Where does the External Battery Pack or AC Adapter/Charger (with a blue ring) plug into the pump?
The port on the bottom of the pump is for the External Battery Pack and/or AC Adapter.
Q: How long should the External Battery Pack be charged prior to use?
The External Battery Pack should be charged initially for 24 hours using the AC Adapter/Charger.
Q: Does the subsequent charging time for the External Battery Pack need to be as long as the initial charge period?
It is recommended that the External Battery Pack be charged for at least 8 hours prior to each subsequent use. The AC Adapter/Charger can be plugged into the External Battery Pack while the External Battery Pack is plugged into the pump. This allows the pump to be fully operational and provides a continuous charge to the External Battery Pack.
Q: How can I clean my pump if it gets dirty?
Clean the pump, remote bolus cord, AC adapter, and battery pack with a soft, clean cloth dampened in any of the following:
- Warm soapy water (do not submerse)
- Isopropyl alcohol
- Household bleach, diluted 9:1 with water
- Commercial disinfectant
- When clean, dry pump and other items with a soft, clean, dry cloth.
Remove A/C power cord from power source prior to cleaning. NEVER submerge pump in water!
CURLIN 6000 & PainSmart FAQs
For Clinicians & Homecare Providers
Q: What should I do if I have questions about the pump?
Whenever you have questions about the pump or your therapy, you should first call your healthcare pharmacy provider. For PUMP and Administration Set only related questions, Moog’s Technical Support Line is found on the back of the pump and available 24 hours a day 7 days per week. Toll Free 1-800.970.2337
Q: What do I do if the pump gets dropped, damaged or the door won’t open properly?
Visually inspect the pump, pumping chamber and administration set before use. Do not use any pump or administration set that appears to be damaged or tampered with or if there is any indication of improper function. Contact your healthcare pharmacy provider for a pump exchange. Remember the sticker on the top of each pump instructs the user “If Dropped, Pump Must be Checked for Accuracy Prior to Use”. The damage may not be visible, however it should be checked.
Q: What is the priming rate of the CURLIN 6000?
300ml/hr
Q: What are the PROGRAMMABLE flow rates?
- CURLIN 6000: 0.1-400 ml/hr, increments of 0.1ml/hr
- CURLIN PainSmart & PCA Mode: Max Basal Rates: IV 50ml/hr, EPI 25ml/hr, SQ 5 ml/hr
Q: What are the infusion rates for a PCA bolus?
Max Bolus Rates: IV 125ml/hr; EPI 90ml/hr, SC 60ml/hr
Q: What is the programmable the volume limits?
1.0 - 9999 ml, in increments of 0.1ml
Q: What is the tested accuracy rate of the CURLIN 6000?
+/- 5% when infusing with medication bag. Moog cannot guarantee +/- 5% accuracy claim when using syringes due to possible issues with stiction.
Q: Does the backlight on the display screen stay on?
While using battery power, the illumination for the display screen will time out and turn off after several seconds of not pushing keys. If using A/C power source, the backlight will remain on continuously if pump is in use.
Q: I see fluctuations in the pressure readings on the display screen during infusions-does this mean a problem with the pump or patients IV?
The Pressure Display provides a real-time display of the current (patient-side downstream) pressure reading during an infusion. This is useful to see how close the pump is to reaching the down occlusion threshold and whether the pressure is increasing or decreasing. This pressure is displayed in millimeter of mercury (mmHg) units. When an increase in the downstream pressure reaches the set sensor level, the pump will alarm and display Down Occlusion.
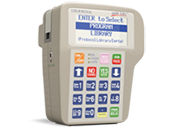
Q: What is the purpose of the words next to the numbers on the pump key pad?
They are the Info-On-Demand (IOD) features. To view any of the Information-On-Demand screens on the pump display, press the related key while the pump is infusing (running a therapy). The information requested will be displayed for several seconds and then the display will return to the previous infusion screen. For further description on each IOD Key, refer to the CURLIN 6000 & CURLIN PainSmart Information on Demand IV Hanger.
Q: How does the patient move around with the pump?
CURLIN 6000 Pumps can be placed in a carry pack specifically designed to allow the patient to be mobile and active while receiving therapy. Refer to the bag manufacturer for proper loading instructions.
Note: The air from the medication bag must be removed prior to connecting to the patient and using in a backpack. Consult with your pharmacy provider for steps removing air if not done prior to use.
Q: How do I hang the pump on an IV pole?
Moog manufactures Detachable Pole Clamps, Pump Holsters and Lockable Safety Shells. Refer to the infusion accessories page for diagrams/descriptions of these products.
Q: What are the specifications of the filter on CURLIN administration sets?
The inline filter comes from the manufacturer in two sizes: .2 micron and 1.2 micron. Consisting of two parts, the fluid filter material is a hydrophilic membrane made of polyether sulfone. It is low protein binding and surfactant free. The air filter material is a hydrophobic membrane made of polytetrafluoroethylene. It is Non-DEHP, BPA free and does not include natural rubber latex.
A document containing this information can be downloaded here.
Q: How do I prime the filter on the 340 administration sets with inline filters?
The filter that should hang in a vertical position during priming. Refer to the set Instructions for Use for detailed direction.
Q: Are CURLIN administration sets PVC free?
All CURLIN administration sets are non-DEHP PVC, and not manufactured with rubber latex. Note: Curlin administration set are 100% PVC in the fluid path.
Q: What do the words UNIDENTIFIED mean on the display screen?
“Unidentified” is a place holder where the drug name would be displayed if the program had been chosen from a drug library. If you are seeing UNIDENTIFIED, there is no drug library in the pump.
Q: What does an anti-siphon valve do?
An anti-siphon valve (ASV) is integrated with the set-positioned towards the distal end. It provides additional free-flow protection. An added feature of the ASV is that it also functions as a back check valve, preventing back flow of blood into the tubing.
Note: Sets with an ASV must be primed using the pump.
Q: What does a Back-Check Valve do?
A Back-Check Valve is an added accessory to the administration set. It is manually placed on the distal luer end of the set. It prevents back up of patient blood into the set that may occur at low infusion rates.
Q: How does the patient bathe or shower during therapy?
The pump is water resistant, but not waterproof, so it should be placed outside the tub or shower.
Q: Can my patient travel with the pump on a plane?
Yes. On the Download page, we have supplied a customer letter that can be provided to the airline company when travelling. Download the commercial air travel letter here.
Q: Can I take the pump into a CT Scan or MRI?
No. Neither the pump nor the administration set can be placed in the MRI room as both have metal. Shield from radiation.
Q: Can I take the pump into a Hyperbaric Chamber?
No, it is not recommended the patient have the pump with them in the chamber. The pump’s keys may be sensitive to the pressure and inadvertently depress.
Q: Where does the remote Bolus Cable plug into on the pump?
The port on the side of the pump is for the remote Bolus Cable with switch.
Q: How does the patient access the Bolus feature?
The pharmacy should provide a remote bolus cable accessory. It plugs into the port on the side of the pump.
If the bolus cable is not available, a bolus can also be delivered by pressing the green BOLUS key located on the front of the pump, at the bottom right side.
Q: How do I know if the patient received a bolus?
When the patient is requesting a bolus, they will hear two beeps if it is within the time interval ordered by the physician and programmed in the pump. One beep means the patient has requested the bolus too early.
Q: Where does the Data Interface Cable (green ring at one end, serial port connector at the other end) plug into on the pump?
The port on the side of the pump is for the Data Interface Cable.
Q: How do I remove the AC Adapter/Charger, the Bolus Cable or the Data Interface Cable from the pump?
Pull on the ring (blue for the AC Adapter/Charger, green for the Bolus Cable and Data Interface Cable) and the cord will be released from the pump.
Q: Approximately how long will new C-cell batteries last?
Battery life depends on the usage. The following times are approximate only:
- Nominal 85 hours at a rate of 2 ml/hr
- Nominal 30 hours at a rate of 125 ml/hr
- Nominal 10 hours at a rate of 400 ml/hr
However, if the patient is frequently pressing keys, that action will illuminate the display and the battery life will be shortened. To extend battery life, the AC Adapter may be used at night.
Q: How can I determine how much battery power is remaining in the pump?
- Read the power bar graph when you first turn on the pump. This is an approximation of the power remaining in the C-cell batteriesUse the options menu and select PWR CK to view the power bar graph while the pump is running.
- Press the # 2 IOD key, Powr Chck (Power Check) while the pump is running/infusing, this will display an approximation of the charge remaining in the C-cell batteries.
WARNING: In a life sustaining situation it is recommended that your Curlin Infusion pump use the AC Adaptor and have a back-up pump available. In addition to the batteries that are installed in the pumps, an extra set of C-cell batteries should be readily accessible.
Q: Are the C-cell batteries in the pump rechargeable?
No. A rechargeable external battery pack and an Adapter/charger are, however, available as a separate accessory for use with the pump.
Q: Can I change the batteries while the pump is running?
Before changing the batteries, you must PAUSE and POWER OFF the pump to avoid a software error occurring.
Q: Where does the External Battery Pack or AC Adapter/Charger (with a blue ring) plug into the pump?
The port on the bottom of the pump is for the External Battery Pack and/or AC Adapter.
Q: How long should the External Battery Pack be charged prior to use?
The External Battery Pack should be charged initially for 24 hours using the AC Adapter/Charger.
Q: Does the subsequent charging time for the External Battery Pack need to be as long as the initial charge period?
It is recommended that the External Battery Pack be charged for at least 8 hours prior to each subsequent use. The AC Adapter/Charger can be plugged into the External Battery Pack while the External Battery Pack is plugged into the pump. This allows the pump to be fully operational and provides a continuous charge to the External Battery Pack.
Q: How can I clean the pump if it gets dirty?
For full instructions refer to our TECHNICAL BRIEF Cleaning the CURLIN 6000 Series Ambulatory Infusion Pump document and/or the CURLIN 6000 or PainSmart User Manuals.
Note: Remove A/C power cord from power source prior to cleaning. NEVER submerge pump in water!
Clean the pump, remote bolus cord, AC adaptor, and battery pack with a soft, clean cloth dampened in any of the following:
- Warm soapy water (do not submerse)
- Isopropyl alcohol
- Household bleach, diluted 9:1 with water
- Commercial disinfectant
- When clean, dry pump and other items with a soft, clean, dry cloth.
Q: Where can I order a pump or supplies?
Q: Can I use non-Moog administration sets in the CURLIN pump?
Use only CURLIN Infusion administration sets in your CURLIN Infusion pump. Use of non-proprietary administration sets may alter accuracy in delivery of fluids and could result in over or under infusions, leading to possible patient injury or death.
Q: How do I access a patient history on the pump?
You will need to use the Patient History Manager Software (PHM) or the Protocol Library Safety System Software (PLSS) to download the pump patient history. Contact Moog Medical Customer Service to purchase either of these items.
Q: Do you have a guide to help me understand a Patient History Log?
Yes, refer to Patient History Log section in the CURLIN 6000 User Manual.
Q: Can I perform my own calibration testing?
Moog recommends annual preventative maintenance performed by a certified NFR technician.
For NFR certification, call Moog Medical Customer Service at 1-800-970-2337
Q: Do you have a procedure to check the pumps?
Yes, we have a procedure to inspect, test, and prepare a pump for use by a new patient. The test checks for volumetric accuracy and all pump safety systems. For this procedure refer to the CURLIN 6000 User Manual and/or our Between Patient Use Training and Quick Reference Guide.
Q: How can I get repairs done?
Call Moog Medical; Customer Support at 800.970.2337 and/or complete Service Request Form, return to [email protected]. Please provide the serial number (on the back) of your pump and reason for return. You will receive an RMA (Return Material Authorization) number that should be placed on the shipping label when the items are sent in to Moog Medical.
Q: Do you have loaner pumps available?
Yes. The company has a loaner program for the CURLIN 6000 pump. When you fill out the RMA form on line or call 800.970.2337, you may request that you are provided a loaner pump. Up to five pumps may be loaned out at one time based on needs of the facility. If additional circumstances require more than this please contact both your sales representative. Note: there is no loaner program for CURLIN PainSmart pumps.
Q: What is the cost to perform repairs?
The minimum charge for repair service is $105 (1 hour of labor) per pump. This represents the time required for the diagnosis and handling of the pump, and will be applied towards the repair cost.
- All products returned to Moog Medical should be postage pre-paid, unless otherwise authorized by Moog Medical.
Training Options

e-Learning
Enroll in our comprehensive online training program and learn from any device or location at your own pace. A certificate of achievement is awarded to each trainee upon successful completion.

On-Site education
In-person training at your location is ideal for larger groups requiring several training classes. Our Clinical Specialist will work with your administrator to organize this hands-on training series.

Live-stream video
Connect your team with our Clinical Specialist via live-stream video. We customize this ideal small-group training to meet the needs of your healthcare organization.
Stay up-to-date on the latest news & insights


Get our latest news, tips, and updates delivered to your inbox.
Sign up to receive our newsletter that will help keep you posted on the latest information in the industry, gain insight and understanding of how to better use Moog Medical products, and to get answers to many commonly asked questions; all delivered right to your inbox.
Industry-leading clinical and customer support options right at your fingertips.
From 24 hour per day clinical support, to live stream training, self-paced e-Learning, and onsite education in your facility; our clinical and customer support teams offer the most comprehensive technical training and support in the industry. Call us at 1.800.970.2337 or click the button below for assistance. You can also find online support with our training videos, troubleshooting, FAQs, and download library.